Shooting Dark Silhouettes of Subjects

This article will cover the very basics of creating dark silhouettes. This is not for people looking to advance their abilities in silhouetting, this is meant to help people who have no idea where to start. With that being said, this article is based on my experiences shooting silhouettes and opinions expressed are my own. For example, I feel the best and simplest description is:
A Silhouette is an outline of an object.
There are many reasons to creating this look, but the most important ones, in my opinion, are the following:
- Adds mystery to the shot.
- Creats a dynamic contrast between the Foreground, Midground, and/or Background planes.
- Highlights or removes details in the different planes.
- Keeps your spectators engaged. When there's only a silhouette, the brain automatically attempt to fill in the shapes (usually doing a successful job). This guarantees their active attention to your piece.
I will be explaining how to achieve the basic, dark subject, light background, silhouette effect. But before we begin, You need a camera/camcorder with manual capabilities (Aperture/Shutter controls).
So how do we achieve this effect?
Simply put, this is how it is done:
The silhouette is created when the shadowed subject is in front of something illuminated or brighter.
That's the basics of it and a good thing to keep in mind. From here, you now have to decide on other factors to complete the effect.
- The first and most important, in my opinion, is deciding how you want your subject's silhouette to look.
- Next is deciding on the background/backdrop.
- Then setting up lights.
- Lastly, you adjust your exposure settings on your camera, mainly, the shutter speed and aperture. And, of course, keep your ISO all the way down (or Gain, if you're using a camcorder).
1) Deciding on Silhouette Style
The ones that I'm most familiar with are the:
- Sharp, All Black Silhouette. The subject's shapes are crisp and most of the outline is identifiable. For example, with this type of silhouette, you can tell what kind of clothes the subject is wearing (e.g. dress, jeans, hat, etc.) or any props s/he that are present.
- Outer Glow Silhouette. The subject is mostly covered in shadow, but the edges of his/her silhouette are exposed with light.
- Out of Focus Silhouette. This style can use either of the previous two styles and as the name suggests, the subject's silhouette is out of focus. In my opinion, this adds more of a fear element rather than mystery, because the shapes become more identifiable.
I will be covering how to do the first two because the third is just a matter of being out of focus.
2) Deciding on Your Background
After choosing what style you want to do, its time to decide on the background.
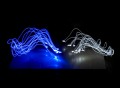
I personally like having a black/dark background when I shoot silhouettes. It's a style choice that I like because it creates a sense of illusion where the subject can disappear into the background and pop back into the foreground. The picture in this section is a frame from a music video I'm working on that demonstrates this style.
The silhouette of my subject is crisp with minimal glow. The clarity of the silhouette is due to the diffusers acting as a backdrop.
-
Using a Backdrop
Using a well lit backdrop is a great way to get silhouettes with minimal glow. I recommend using a fabric that has some transparency so you can light it from behind. But, if you can't or don't want to do that, you can still light it from the front.
After, you would place your subject in between the lit backdrop and your camera. Then you would begin to adjust your capture settings, which I go into detail in section 4. Keep in mind that distancing your subject from your backdrop will give you better results; a darker silhouette and less glow.
**Quick tip: If you have a large wall available to you, it can be used as your backdrop, saving you time and money!
**Also, keep in mind that you don't have to use a white backdrop. It's a good start for beginners because it creates the effect easier than other colors. Simply, the opposite of the black shadows is white, thus white is the best contrast.
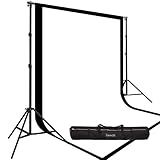
If you want to buy all the necessary materials for a backdrop in a single package, I have included a link to a decent package deal to the right. It is a package that includes a good sized Muslin Backdrop, stands, and frame to hold it up.
I haven't purchased this, but I have worked with it in the past. What I like about it is that the muslin is thin enough that it will glow in the front when lit from the back. Also, its good to have for future projects.
Cons:
- Have to build it
- Can be costly if you don't have supplies (lights, fabric, trusses, etc)
- Can take a lot of space when set up
Pros:
- Cleaner Silhouettes
- Easily Create Silhouettes
- You can shoot on your time
- Easy to work with in Post

-
Using Surroundings (no backdrop)
Not having a backdrop is difficult, but not impossible. You have to depend on your surroundings such as sun position, time of day, and location. When done correctly, it can produce a dramatic shot in an everyday scene. For me, the best way to explain this is through examples.
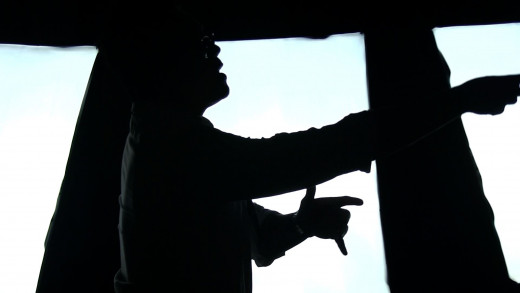
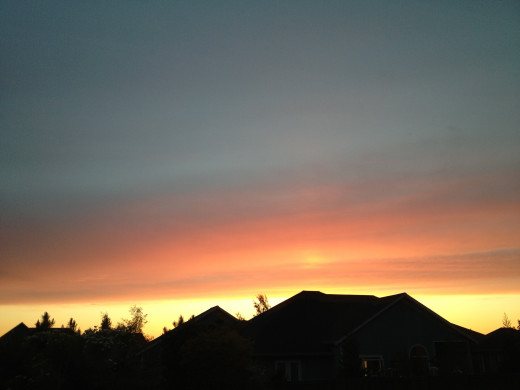
In these photos I took, you can see that I used the sun to create the silhouette of a person's face and rooftops on the horizon. With the picture of the man on the fence, you may have noticed from the light and shadows that I was shooting adjacent to the direction of the light. His face is covered in shadows created by the light hitting the back of his head. The background of the shot is well lit, allowing the silhouette of the man's face to be seen. The picture of the rooftops was created in the same way. The shadows were created by the angle of the sun's light hitting the opposite side of the house.
Cons:
- Many circumstances to consider and have to be met
- Time and Location specific
- Fairly limited amount of time to shoot
Pros:
- Cost efficient
- Creates a dramatic look out of everyday places
- Nothing to set up
3) Setting Up Lights, If Needed
You only need to set up lights if you are using a backdrop and/or if you want to add a glow to your subject. If this does not apply to you, you can move on to step 4.
So, we understand that the best way to create our effect is to have a well lit backdrop/background and an unlit subject. I touched on lighting a backdrop briefly and will go further into detail on the best way to go about it.
I want to start off by saying that you don't need an actual backdrop to create this effect. Like I said earlier, you can light up a large wall or anything in the background that will contrast with the outline of the silhouette. The examples in the "no backdrop" section demonstrates using the sun to light the background and the subject's body to create their own shadows.
So, anyway, How do we light up our background/backdrop?
Choosing material and deciding to shoot from the back or front:
For the best results, as I've said earlier, I recommend a using fabric with a little bit of transparency. Just enough so that when lit, it will glow brightly when seen from the opposite side. Again, you can always light it from the front (the side where your subject is). Either way, lighting the backdrop is the same on either side. The only difference is when lighting from the front you may have to deal with the lighting units being in the shot. Not a big deal.

The lights:
Lucky for us, we don't need to spend hundreds on Fresnels. There are many work lights that will work for our purposes. We want lights that can give off a lot of light in a wide area. Halogen Bulb work lights do this well. I recommend three, but at least two (one in the middle and one on each side). Having three will help keep the amount of light even, but not having a middle light isn't essential. I recommend going to Home Depot or Lowes (or a similar store), because many of the ones online have to be assembled. The negative things about these are that they need to stay on the ground because the housing can get hot and if you put it on something, there is a chance that they will damage it or maybe set fire to it. But, at least they are slightly angled up so putting them on something isn't entirely necessary.


Lighting Position:
To the right I have created two (poorly made) diagrams of how you would generally position your lights. Remember, its best that there are no other lights on (such as the sun, other house lights, etc.) other than the ones you are using for the backdrop because having unnecessary lights will ruin the contrast between it and your subject.
From here, you want to tweak the positions a bit to create a style that suits you. Here is a list of things you should keep in mind when developing your shot.
- Distancing the lights from the backdrop creates a more even spread of light across it.
- Alternately, hotspots (over saturation of light in an area) can be created by bringing the lights closer to the backdrop. Its an unorthodox style, but I've seen many successful shots done this way.
This is why I prefer lighting behind the backdrop. Its out of the way, giving me more positioning options for my subject and lights.

Creating the outer glow:
This can be done with or without the backdrop. I have included, yet another, decently bad diagram of how you might want your lights to be set up to create a glow around your subject.
As seen in my "diagram" your lights still have to be behind your subject, but to create the glow, your lights should be almost on the lateral of your subject. This will allow the light to creep over the edges of your subject's silhouette.

To the right is an example of the diagram before I finalized my camera settings. You can see that there were already heavy shadows on the inner parts of my subject along with a glow on his edges. I zoomed out so you can see where I put my lights and how it affected my subject.
Play around with your lights to create a style you like. For example, you can use one light to light a side of the subject and have the other side fade into the background.
4) Camera Settings
Now that everything is in place, it's time to adjust your camera settings.
Shutter:
I set my shutter to about 1/100th or 1/250th of a second. Keep in mind that I usually do music videos, so I like having a quicker shutter to make sure that my frames are crisp. If my shutter is slower, then there's the chance that I'll have frames with some motion blur which would add some fuzziness to my subject's silhouette. Either way, if you're using a DSLR I still recommend a faster shutter speed for the same reason above.
Aperture:
Your aperture should be your main adjustment for creating the silhouette. Begin with your aperture wide open. Then start to close it one size at a time until you create your silhouette.
Depending on your camera, you may not be able to close your aperture enough to get the silhouette you want. If this is so, feel free to speed up your shutter. Essentially, a fast shutter speed means less light will be picked up.

If there's still too much light getting through, your aperture is at its smallest, and your shutter is at its fastest, you can try to lessen the intensity of your lights. This is a "Last Resort" situation because you begin to lose contrast as you de-intensify the lights. But if you must, to the right is something you can use and might work:
- Diffuse the light with actual diffusers or gels.
- Reflect the light with a reflective material like a foil (don't use a mirror).
In Conclusion
Being able to create silhouettes is a good ability to add to your arsenal. Though, we have only covered the bare basics, exploring how light works and effects your subject and even the world around you will give you a better artistic eye. If you decide to advance in silhouettes, you will find that what I have covered here is only the tip of the silhouette/shadow iceberg. There are so many ways you can tweak what I've covered to create new and unique shots.
I thank you for reading my article and if there are any ways for me to improve this or future articles, don't be afraid to critique! Thanks again.
© 2013 KDomingo